(This post used to be on the old, malware-infested forum. Resurrected here for all to enjoy.)
Sometimes people ask if they can use the Video Game Shield on an Arduino Mega instead of just the Arduino UNO. Well, the answer is kinda, but you need to make some modifications first. This is due to the very low-level code used by the Arduino TVout library (hand optimized AVR assembly code is needed for the very precise timing required to generate the composite video signal) which uses the AVR chip’s pins below the Arduino abstraction layer.
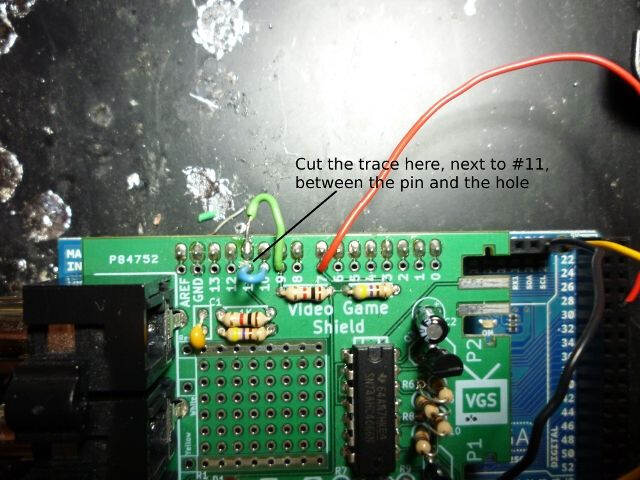
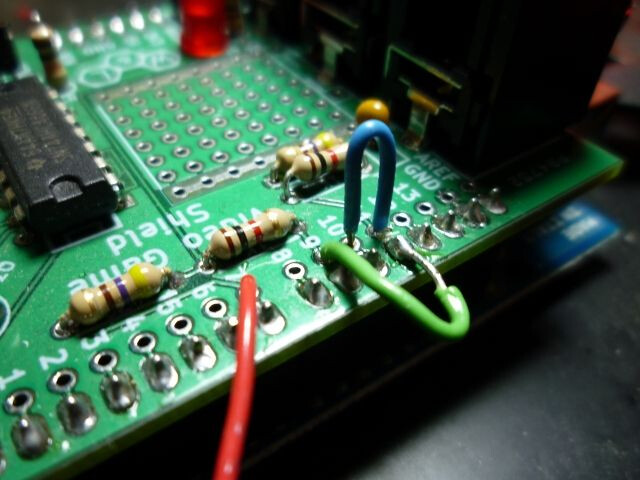
- Cut the trace between VGS pin 11 and the hole next to it. Solder a wire from the shield hole 9 to the shield pin 11 (green wire). This connects the SYNC signal to the proper pin (PORTB5) on the Mega.
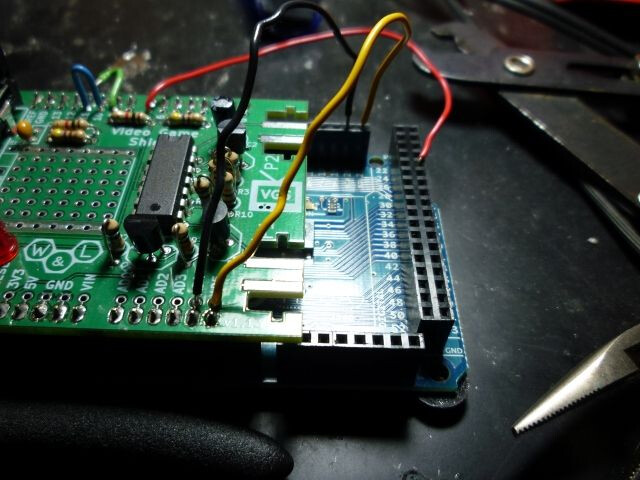
- Solder a wire into the shield hole 7, and plug it into the mega’s digital pin 29 (red wire). This connects the VIDEO signal to the proper pin (PORTA7) on the Mega.
- Solder a wire from shield hole 10 to shield hole 11 (blue wire). This connects the audio signal.
- For the nunchuck connections, there are three wires:
- The I2C SDA pin has been moved to D20 on the Mega. Solder a wire into the shield hole AD4, and plug it into D20, labeled SDA (black wire).
- The I2C SCL pin has been moved to D21 on the Mega. Solder a wire into the shield hole AD5, and plug it into D21, labeled SCL (yellow wire).
- The pin that indicates which Nunchuck to talk to is D12, and doesn’t need to be changed (because we use the Arduino “name” D12 instead of the low-level AVR pin name).
- Using these modifications, everything should be working great.
- Here are a few photos of everything soldered up and plugged into the Mega. Keep in mind that some of the pins are still connected, for example, pin 7 on the shield is connected to both D7 and D29, so don’t use D7 for anything (leave it as an input). These are the pins that shouldn’t be used in your sketch: AD4, AD5, D7, and D9.
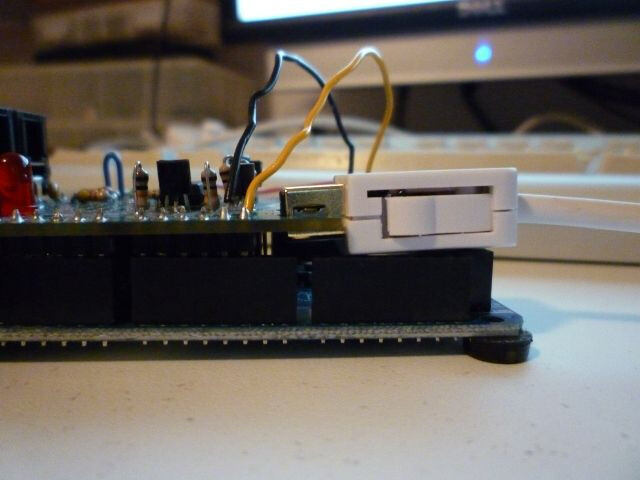
(Close-up of the Nunchuck extension cable, minus the clear plastic piece, plugged into the VGS on the Arduino Mega.)